Tuesday, November 29, 2011

So I adjusted my project list a little

After Bordermarch Autumn Melees I realized that my youngest really  needed some new garb so this week I whipped together an Italian Ren from fabric that was given to me.  I love getting scrap fabric (1-2 yards) from people, so that I can make garb for Ainsley.  I always swore that T-tunics, saxons, and vikings are the easiest things to make, but now I've realized that a basic Italian is just as easy when you already have the pattern in place.  I made the pattern for her a couple years ago and the bodice still fits ok.  The pattern is wide enough that she will still be able to grow in it.
This is the back piece and when I made the original pattern, I forgot to make the top sleeve long enough so have to remember to add 2" to the shoulder piece.  Thankfully I marked that on the piece otherwise I'd never remember!  I really like using these paper patterns that I've drafted onto butcher paper instead of the old tissue patterns.  This paper you can mark up however you need to and change as needed.
This is the front of the bodice.  I think the next time I make a dress out of this pattern I need to shrink the back piece a little along the side so that it doesn't come out as wide.

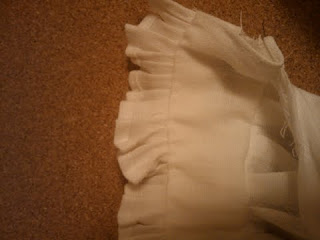
 To put the bodice piece together, I sewed the lining to the front piece (for this dress I just used the same fabric for both sides since I didn't have any linen this color) on both the back and front pieces, leaving the bottom and shoulders open.  Next I inserted the front piece shoulder right side out and all ironed into the back piece shoulder that was still turned inside out.  I sewed along the shoulder seam (several times since I didn't get one side of the front pulled all the way through) and then pulled the back side right side out to make an enclosed shoulder seam.  I hope that explanation makes sense, once I did it the first time ever, it's an easy concept.  The only issues I have with this method is making sure the shoulders are even.  Sometimes it doesn't come out very pretty but it also depends on the fabric.  Next I box pleated the skirt panels to the right side of both the front and the back and then hand sewed the lining down over the seam to seal it.  I sewed the skirt panels together leaving a small opening on the side below the bodice and then hemmed the bottom seam.  On the bottom seam, I decided to leave 3 inches extra tucked up in the hem to allow for height adjustment.  The way Ainsley is growing she will be taller than she is wide for quite awhile so the hem is more important than the width.

Today I'm working on tacking on some lacing rings so that the bodice size can be adjusted as well if she needs it.  Hopefully they don't make the sides too bulky but we'll see.  After work today, I'll adjust a camica that I had started awhile back for me for her to wear underneath this.  I need to finish the arms and adjust the hem a little since I had originally made it a little short for me.  After tonight she'll have a completely new dress for this weekend's Yule event and it will have only taken me about 4 hours worth of work!  I think that may be one of the quickest projects I've completed in awhile.

Tuesday, November 22, 2011

Finished projects

I finally finished the Wool Cassock!!! We had Bordermarch Autumn Melees this past weekend and I got it done on the road as is usual.

The weekend before I worked on getting all the button holes sewn on.  I have a really hard time getting the button holes even so have to mark everything up A LOT!

 The pattern called for the buttons to be 1" apart so that there would be over 150 buttons...That is entirely too many buttons for me to sew and for the man to button and unbutton as he needs to so I marked the holes 2" apart and ended up with about 68 buttons.
And then I marked the beginning of the hole and the end to give me some guidance while putting it on the machine.  I have issues getting the button holes too close to the edge so have to really mark the back edge.

 
Excuse the mess on the bed, we were unloading after camping and I forgot to get a picture of him wearing the garment (*smacks head*).  It looked really really good on and got lots of compliments, so it was very much a successful project!  I would like to add lucet cord as trim around the collar and the epaulets to add a little color so that may be a project over the holidays.

Monday, October 31, 2011

Progress!! Finally!

I have finally made progress on a couple of the projects!  I have finally finished the Men's Renaissance shirt.

 It doesn't look pretty on the hanger, but always looks nice underneath a doublet/jerkin.

I did also take some time to tackle the cassock that i have had in the works.  I was having issues mentally getting the pieces together so was reluctant to work on it and have to redo something.  Finally I gave myself an hour to work while my daughter and I watched Charlie Brown and just went with the flow of the garment.  Surprisingly it came out the right way and i didn't have to redo any of it.  It fits perfectly and now just needs a bottom hem and the millions of buttons that go on a cassock.
 This is the front view (my youngest is holding it for me).  It's really bad quality on the picture taking but I can't ask for too much more from a camera phone.  The lining color is not quite the same as the wool but it is close enough.  In person you can see the difference but I'm not too worried about it.
This is the back view.

After measuring out the button placement, at 1 1/2 inches apart, the cassock would require 118 buttons.  i have had other people tell me that at 2 inches apart I can manage about 60 buttons.  I'm waiting for the buttons to come to me and then I can place them on the cassock and get a better idea of how many button holes I want to suffer through.  Thankfully my machine does buttonholes easily for me, it just will require a lot of time.

Monday, October 24, 2011

Sewing Sewing Sewing

I have almost completed the shirt for Mike, it just needs button holes on the sleeves, buttons and a bottom hem.  I forgot to take pictures of the finished neckline so will have to do that when i work on it next.

Next on the list is to finish the wool cassock before Bordermarch Autumn Melees, which can be hot, cold, wet or all of the above :)  The man needs a warm cloak so really need to finish it.  I've got the body mostly together, just need to add the collar, epilets, and sleeves then the millions of buttons it requires.  I need to still find those buttons too which is the hard part.

After the cassock is done, i need to work on my German dress for Stargate Yule which is coming up quickly as well.  Hopefully that one won't take too long since I'm making a simple camp frau type of dress.

Wednesday, October 12, 2011

Men's Shirt

Made some more progress on the shirt last night.  I worked on finishing sewing the pleats onto the cuffs and sewing the under cuff.  I then put on Confessions of a Shopaholic and hand sewed the under cuff to finish off the sleeves.

All the sleeves need now are the buttons and button holes.  This weekend i plan on grabbing the man for a fitting and finish the neckline.  Next on the list is the Wool Cassock.  I have got to get projects off my list!

Monday, October 10, 2011

Men's Shirt

So last Tuesday I had time to work a little bit more on the shirt for the man.  The pattern is easy, just requires a lot of pieces for the  cuffs and neck.  Since I had to do a lot of hand pleating, I put on Les Miserables and sat down to work.  The last time I worked on the shirt, I attached the sleeves to the body and the neck gores.  This time I was ready to attached one side of the cuffs and the ruffles at the end of the cuff.
 This step requires the base of the sleeve to be pleated to all fit on the cuff.  This is blackwork that I had previously completed (about a year ago, shame on me).  One of the sleeves took me a couple times since i had the black work design going a different direction than the other.  I thought about leaving it, but changed my mind and went a head and fixed it :)

 The next step is to take a yard of fabric and pleat it into a 10" piece.  There are a ton of tiny pleats to fit and I decided not to redo it so ended up with a piece that needs to be cut off and hemmed so it all fits.  I think I ended up leaving about a 3" piece off the end of the pleats.

Since I was so engrossed in the movie, this is as far as I got on both sleeves (Shame on me!).  Next I need to sew down the ruffles and then I can attach the back cuff and hand sew that down.  I will be able to finish that portion of the sleeve tomorrow.  I need to have the man try on the shirt so that I can do the same process to the neck ruffle and collar.

Monday, September 26, 2011

Got Sidetracked

Well my list of projects got put to the side this weekend when i got inspired by some fabric i saw at Hobby Lobby. One of my walls in my stairwell has been bare and waiting for a tapestry for over a year now and when I saw this fabric I knew that it would go very nicely on that wall.

The picture really doesn't do it justice, but it has creams, blues, reds, and browns in it that all blend nicely together with the various textures.

My plan is to have two panels on the same curtain rod so that some of the wall comes through, with it being hung off the rod like the picture below.

I have the two panels cut out and one sewn to the back fabric. I didn't make as much progress as I wanted to, but i will get it done on Friday.

Update:  Here is a picture of the tapestry hanging on the wall by the stairs.

Friday, September 16, 2011

Lucet cord

Today I've started the cord for the rapier shirt. It's an easy process and is fairly mindless so I should be able to whip out the length I need today, especially since my youngest has a doctor's appointment and there will be waiting room time :)

There is of course a wiki page for the Lucet (http://en.wikipedia.org/wiki/Lucet) that has the basic information and has links to youtube for some further instruction. I was taught by my friend Sara and was amazed at how easy it is.


This is my lucet that my husband cut out for me several years ago. They only require the two prongs but i do find the handle useful.

Monday, September 12, 2011

Shirt Progress

So I worked a little bit on the rapier shirt for Mike. I previously posted a picture of the blackwork that goes on the cuff. I had wanted to knock out the cassock, but needed him at home to try it on for the collar area so had to work on something else. The shirt was all cut out so I started it a bit. I didn't get very far since I was also helping Ainsley sew on her new little sewing machine ($14, not worth the aggravation) and got tired of bending over so needed a break.

I have used this pattern in the past http://www.houseffg.org/resources/Elizabethan_Shirt.pdf and the shirts really come out nicely, they just have a lot of little parts to put all together. They fit him well and don't require modification to the pattern except a little extra length in the body since his is so tall.


This picture shows the sleeves being attached. I realized at this point that i hadn't cut them wide enough so had to recut sleeves and re attach them. Since the pattern is done by just measurements, i must have cut something wrong in the beginning, thankfully it was an easy fix. Sleeves are just rectangles so didn't require more than 5 minutes to fix it.


I got as far as putting the body completely together as is shown in the picture above. This portion of the pattern is very easy to go together, it's getting all the wrist cuffs and neck cuff with the ruffles that takes the longest and requires some hand sewing to finish it off. I do need to lucet some cord for the neck tie, so will do that during the week before I get back to sewing again. I will post about the lucet cord as well and will try to take pictures of the process.

Monday, August 29, 2011

17th Century Wool Cassock

So since the hubby is a rapier fighter and needs something other than a cloak which doesn't allow for arms to be used. I don't like the cloaks that have the arm holes because then your arms get cold and it's hard to pull them in and out from underneath the cloak.

I purchased the wool from Joann's while my store was closing so got an amazing deal. I think I paid $12/yard for 100% wool that is a gorgeous teal color. I found some linen from my favorite online linen place for $6.50/yard that is very close in color ( http://fabric-store.com/first.php?goto=big_fabric&menu=f&menu=f&fabric_id=577) It's close enough that it will do for a lining.

This weekend i finally got back into my sewing room to work on projects. My goal is to finish all the wool stuff BEFORE it's needed in January. We are in South-Eastern Texas so the weather around here is iffy when it comes to cold. We may need the wool stuff in November so that is my current goal for one of the wool pieces to be completely finished. I had cut out the pattern several months ago so all I had to do was start assembling the pieces. I have the main body of the wool and the linen sewn together, they just need to be put together so that the lining isn't loose. I didn't like the way the pattern said to put the lining with each individual piece so I'm winging that portion of the instructions. I have the sleeves sewn with their lining, same with the collar and shoulder pieces. I am at the point that they need to be turned right side out and ironed flat then sewn onto the main body. I plan on sewing the lining of the main body together before I attach the sleeves so we'll see how that goes.

Once I get the sleeves, collar, and shoulder pieces sewn on that covers the bulk of the sewing and it will have to go hang in the closet until I can find a TON of buttons that I like and are of a good quality to go on it.

Project List

I decided to start a blog to help me keep track of my SCA sewing projects that i have going. I always seem to have various things in the works and sometimes need to remember everything I need to complete the projects.

The order may change as I work through projects:

1) Teal Wool Cassock
I found this wool at Joann's of all places and it is a really gorgeous color and texture so I bought the whole bolt to make several things with. The first one is a 17th Century Cassock. I know it's a little after period for what the SCA is, but it's a better option for the man who is a rapier fighter to wear. This is the pattern i'm using and it is fairly straight forward. It actually didn't require any changes so that makes me happy.

The only thing left that I need to purchase to finish the project is the buttons. I need to do some searching to find what size I need and the amount that i want. it requires a TON of buttons.

2) Teal Wool Doublet
I got Janet Arnold's
Patterns of Fashion: The Cut and Construction of Clothes for Men and Women, C.1560-1620
for christmas and saw this doublet that I wanted to make and I thought the wool would be a good start for it. This is the doublet pattern

I've made the trim from lucet cord so that it is substantial against the wool. I haven't decided on the style of sleeves yet but I have a feeling those will just be plain. I have everything I need to make it, however I have cut out only the linen layer and not into the wool yet. Once I get the Cassock done and just needing buttons then I will finish cutting out the doublet and work on hand sewing the trim to the wool. I'm not sure how much trim i currently have so will have to see how much detail actually goes on the doublet.

3) Linen Rapier shirt. This I already have cut out, just need to sew all the pieces together. I have blackwork embroidery for the cuffs ready to go. This is probably the project that requires the least bit of work and I'm not sure why I've put it off for so long.


4) A new German dress for me. I've never attempted a german before so this will be a trial for me. I have a fitted italian ren that I should be able to use the bodice pattern for, it just requires some modification. More information about this project later.

5) After I make this first German dress, I have plans for a second one that involves using german embroidery that uses the concept that Master Richard Wymarc fully researched (http://wymarc.com/asoot/asoot.php). I know there are no examples of it being used on clothes, however I'm going to use the technique anyway because I think it will have a great effect.

Those are the projects at the moment. I'm sure this list will evolve and grow as I come up with more ideas of what to make.